Below are some simplet steps on how to make a blog look and act like one of those expensive wedding websites.
Head to Blogger.com and follow the steps for setting up a blog. Blogger is pretty user friendly…if you haven’t used it before; I suggest playing around with it a bit. You can very easily just write posts about your wedding and just call it a day. But if you are interested in setting up your blog so that it flows like a wedding website and you understand even just a little bit how links on a blog work than keep reading.
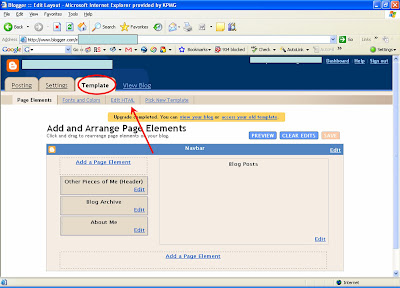
The first thing to do is get yourself out of the purgatory that is Blogger’s new customizable design template and make sure you are using what they call the ‘classic template’. To do that, click on the ‘Template’ tab at the top of the blogger page once you have opened your blog settings. Then choose ‘Edit HTML’ from the next menu down. (click on any of the images below to see the details up close).
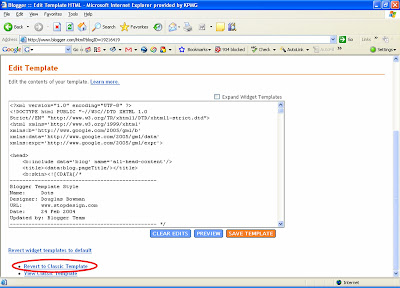
Scroll down to the bottom of the page and click on the link to ‘Revert to Classic Template’. A dialogue box will pop up warning you that any customizations you have made to your template will be lost by making the change, but if you haven’t made any customizations yet, than you needn’t worry.
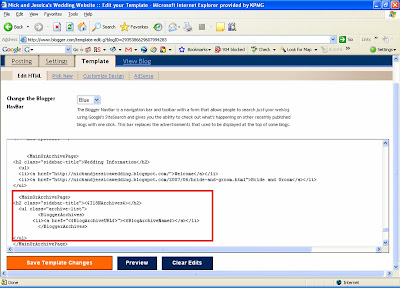
Depending on which template you have chosen the following may differ, but for the most part, down towards the bottom of all of the text that shows up in your template there should be a section of text that looks like this:
Copy this entire section of text and insert it just above the section you took it from. Then, following the diagram below, change the text in the section you just created like this:
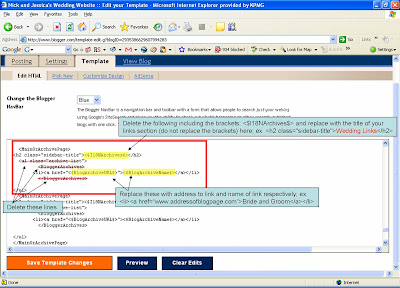
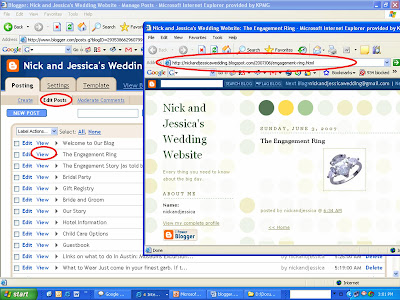
You can get the exact web address of your individual blog posts by clicking ‘view’ next to the post you are interested in on the ‘Edit Posts’ section of your Blogger settings. The post will open up in a new page and you can copy and paste the address to use in your template. (see below)
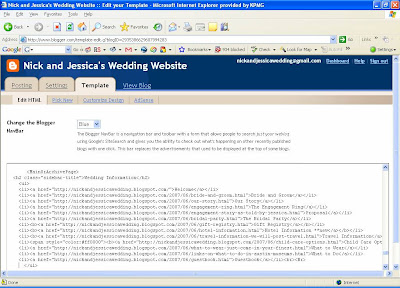
Now you can keep adding links in that section of the template and they will line up neatly on the side of your blog page helping guests to your page find their way. Below is a screen shot of the all of the links I inserted into the template for a dummy wedding blog I created for Nick and Jessica. You can see that some of the links have the letter ‘B’ in brackets before and after sections of the link. That just makes whatever falls between the two brackets bold. Just remember to always ‘close’ your bracket set with a backslash or everything else after that point will end up bold as well. For instance < .b > now I am bold and< / b > now I am not.
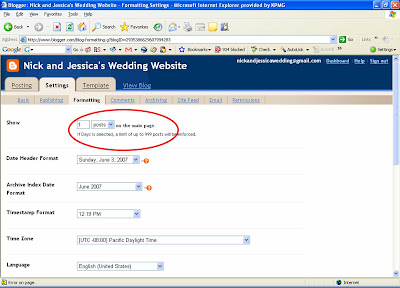
The last thing I did with the blog to make it look like the expensive wedding sites was I made sure only one post, my welcome post, showed up on the page. To do that, I chose the option in the blog settings to only have one blog show on the page and made sure the date and time on the Welcome post was the most recent date of all of my posts.
If you are interested in making a blog like this, I encourage you to visit the dummy blog. The address is http://nickandjessicawedding.blogspot.com. Look around at how it is organized, and if you have any questions let me know. I really am an amateur at this, so I am not sure how helpful I will be, but I can certainly try.
Oh, and one last thing; there are a TON of free Blogger 'skins' out there. Feel free to adopt one of those instead of sticking with the boring 'classic template'.
No comments:
Post a Comment